


Hello everyone! Today we will learn how to deploy our very own private cloud using OpenStack, on a virtualized server. Before we jump into creating our cloud, let's define some terms first.
What is a private cloud?
To start, a cloud is basically a virtualized network and a data center that comes with great levels of scalability and agility. A private cloud is a cloud computing environment that provides a single-tenant organization with computing services in a private internal network and high levels of security and privacy, usually within the user's firewall. With that comes very important advantages such as control and security.
Why would you want to leverage the cloud?
As companies and organizations take off and grow in size their network usually grows as well and their need for more data center resources equally follows. Leveraging the cloud can help minimize those needs as purchasing multiple physical servers can cost a great deal of money, versus leveraging the scalability and agility that comes with the cloud, especially when expanding is the goal.
what do I mean by a virtualized server?
Virtualization is basically creating a virtual version of something, and more specifically in our case - server virtualization. So, a virtualized server means we installed a virtual machine manager or any VM software of the same sort on our physical server system. This makes it possible for us to tap into the server's full capacity and create many isolated logical computers ( instances ), from one.
In other to create our private cloud, we're going to leverage two things here:
- our virtual environment - to provide the resources we need
- an operating system ( we will use the Linux operating system since we're working with OpenStack) to provide OpenStack with the tools we need.
FIRST: Creating a virtual machine on a virtualized server.
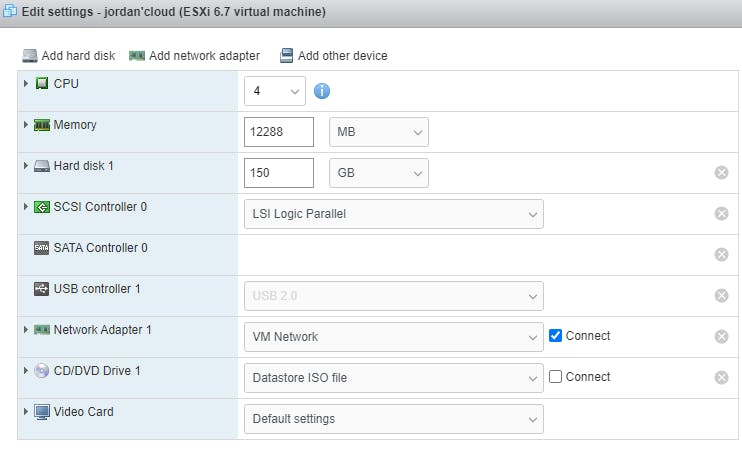
For this project, we're going to be working with one physical machine. This is called a single-node cloud, meaning all our services will reside on that one node. Also, I'll be working with an Ubuntu 20.04 and it'll be best if your virtual machine meets the following requirement:
- minimum 8 GB of memory
- at least 100 GB of hard disk capacity
- At least 4vCPUs
Creating this virtual machine shouldn't take too long, but give it some time if it doesn't pop up right away.

Now that we have our Linux virtual machine, power it on and let's hop on the terminal where we'll be typing the necessary scripts for the installation.
NEXT: Installing OpenStack on your Linux virtual machine.
Before we start, let's make sure we have a complete update of the packages. So the first thing we'll do in our terminal is to type the following command:
- sudo apt-get update

Once our packages and repositories are up to date, we're going to use the snap command to install microstack on our virtual machine. In ubuntu 20.04, Snap packages comes already installed so you don't have to. MicroStack makes it simple to create and test OpenStack workloads on your laptop or on a virtual machine. Use the command
- sudo snap install microstack --devmode --beta

It'll take a minute, but you'll know it's done installing when that little green checkmark appears right next to " canonical".
In this next step, we will automatically deploy, configure, and start the OpenStack services. That'll create the necessary database, networks, an image, several flavors, and ICMP/SSH security groups. This can take up to 20 minutes depending on your machine and internet connection. For that, use the command:
- sudo microstack init --auto --control

Now that's done, let's make sure our cloud is working by looking at some of the defaults used by microstack. Let's check out the flavors first. Type the following command:
- microstack.OpenStack flavor list

let's also look at some of the images that come with it. Type the following command:
- microstack.OpenStack image list

Now let's try to create an instance through our command line. We'll use the microstack launch command and it'll give us an m.tiny instance and a floating IP address on subnet '10.20.20.0/24'. We'll create our first instance- " test", with a cirros image. It'll provide you with a link at which you can access your OpenStack dashboard Type the following command:
- microstack launch cirros -n test

Now we'll need a password. We'll get one using the config.credentials command, and later on change in our OpenStack environment settings. Type the following command:
- sudo snap get microstack.credentials.keystone-password

On the dashboard, we'll be able to see an overview of what we have going on. Our computes, volume, and network are displayed.
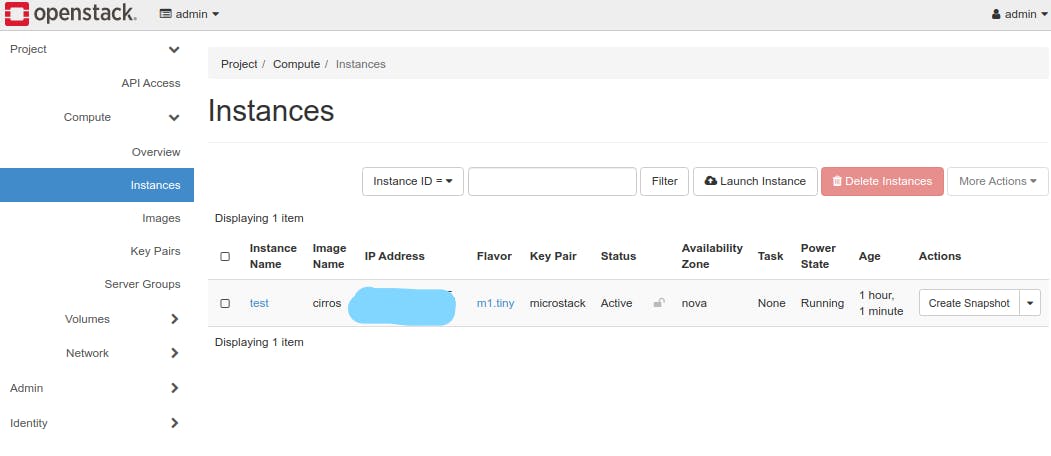
I can also have a more detailed view of my instances, such as IP addresses, security groups, and metadata about our instances.
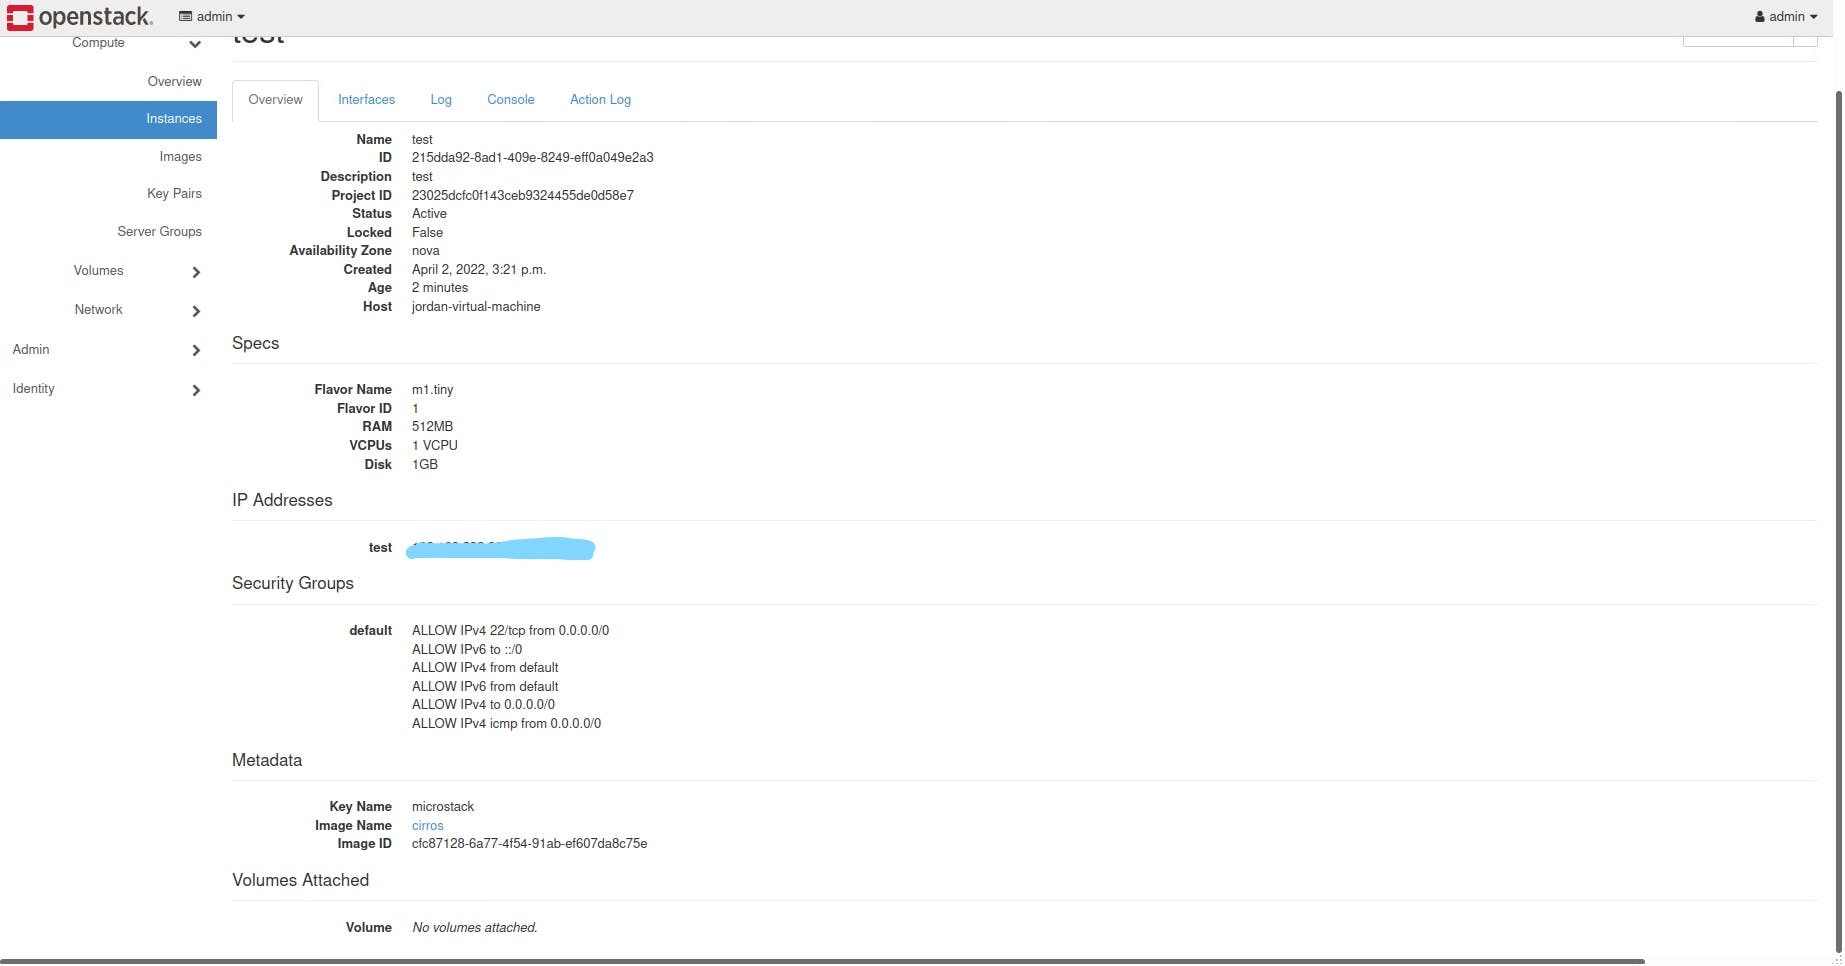
Congratulations, you just successfully created your first instance in your very own private OpenStack could !!
Thank you for reading, and I'll see you next time for more cloud computing !!
Jordan.